Get started with Git
It’s commonly known that Git is too complex for beginners. Yet, what is complex is the way we are introducing Git to beginners . So don’t panic, just follow this tutorial step by step and you will discover how simple Git is !
This tutorial walks you through the basics of Git : initializing your projects , managing new and existing files and storing your code in the cloud. Other complex parts of Git, like branching, are reviewed in coming tutorials (when you are no longer a Git beginner !![]() ).
).
Why using Git ?
Say you and a colleague are both updating files on the same application. You make your changes, save them, and upload them back to the project. The problem comes when your colleague is working on the same file as you at the same time. One of you is about to have your work overwritten and erased.
A version control application like Git keeps that from happening. You and your colleague can each upload your revisions to the same file, and Git will save two copies. Later, you can merge your changes together without losing any work along the way. You can even revert to an earlier version at any time, because Git keeps a “snapshot” of every change ever made.
Now, what is GitHub ?!
GitHub is a software that provides a visual interface for you to manage your version-controlled projects locally. Creating an account on GitHub.com brings your version-controlled projects to the cloud.
Git-specific commands and terms
There are some Git-specific terms which you will read often in this tutorial. Let’s go through them one by one .
• Repository : a directory or storage space where your projects can live. It can be local to a folder on your computer, or it can be a storage space on GitHub or another online host. You can keep code files, text files, image files, you name it, inside a repository.
• Version control : it’s the purpose for which git was designed . It’s the fact of keeping “snapshots” of every point in time in the project’s history, so you can never lose or overwrite it, whenever you make changes to it?
• Commit: It’s one of git’s important commands. When you commit, you are taking a “snapshot” of your repository at that point in time, giving you a checkpoint to which you can reevaluate or restore your project to any previous state.
• Branch: people working on a git project at the same time “branch off” of the main project with their own versions full of changes they themselves have made. After they’re done, it’s time to “merge” that branch back with the “master,” the main directory of the project.
You also need to know about some of the many Git commands. The very basic commands are :
• git init : Initializes a new Git repository. Until you run this command inside a repository or directory, it’s just a regular folder. Only after you input this does it accept further Git commands.
• git status : Check the status of your repository. See which files are inside it, which changes still need to be committed, and which branch of the repository you’re currently working on.
• git add : This does not add new files to your repository. Instead, it brings new files to Git’s attention. After you add files, they’re included in Git’s “snapshots” of the repository.
• git commit : Git’s most important command. After you make any sort of change, you input this in order to take a “snapshot” of the repository.
• git push : If you’re working on your local computer, and want your commits to be visible online on GitHub as well, you “push” the changes up to GitHub with this command.
• git pull : If you’re working on your local computer and want the most up-to-date version of your repository to work with, you “pull” the changes down from GitHub with this command.
• git branch : Working with multiple collaborators and want to make changes on your own? This command will let you build a new branch, or timeline of commits, of changes and file additions that are completely your own.
• git merge : When you’re done working on a branch, you can merge your changes back to the master branch, which is visible to all collaborators.
• git help : Forgot a command? Type this into the command line to bring up the 21 most common git commands.
Setting up Git and Github
First, you’ll need to sign up for an account on GitHub.com. Then, you have to install Git.
Now, start the Git Bash app you just installed, and introduce yourself to Git. Type in the following code:
git config --global user.name "Your Name Here"
git config --global user.email "your_email@youremail.com"
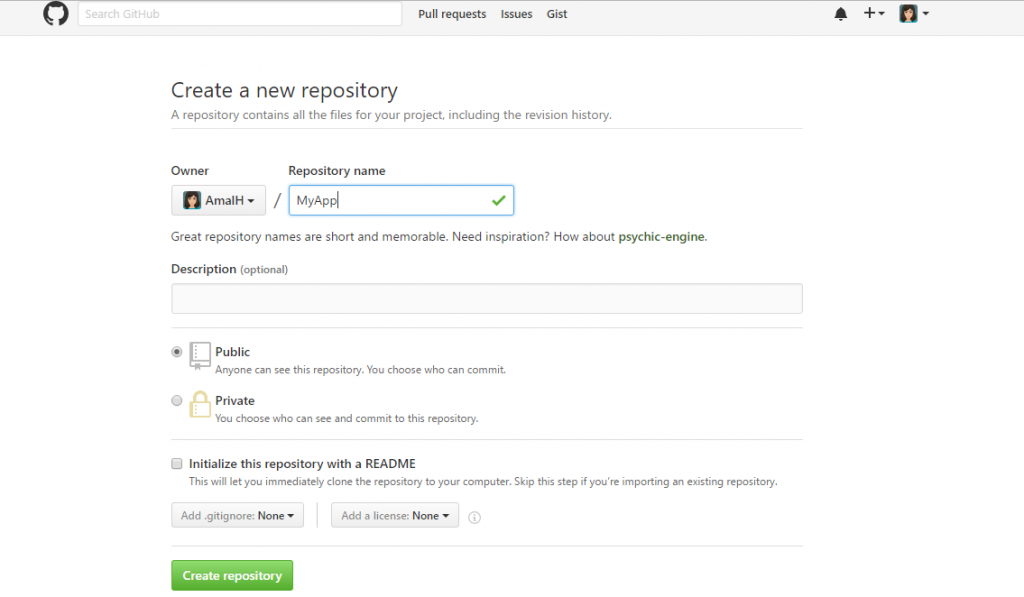
Next step is to create your online repository : go to GitHub.com and go to new repository page . Give your project a name and make it public .
Then, create your local repository. Using command line, go inside this directory ( cd ~/MyApp ) and run the following git init command :
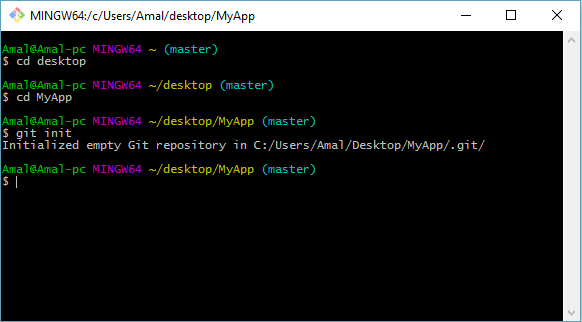
Your computer now realizes this directory is Git-ready, and you can start inputting Git commands.
Staging files for commit
First step here is to add some files to your repository (use a text editor or the touch command).
Let us check how git treats those files : if we type git status command we’ll get this result :

At this point, you dont have any files for Git to track. You need to add files specifically to Git order to tell Git to track them. You add files using git add command
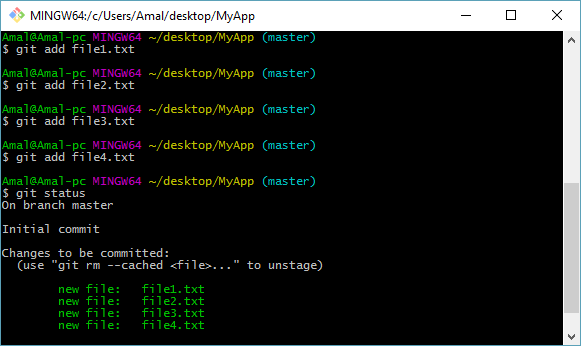
To add multiple files you can use [ git add file1 file2 ] .
To remove a file use [ git rm –cached [filename] ] .
Commiting changes
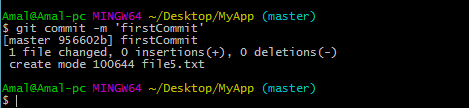
Once you have staged your files, you can commit them into Git using git commit command . You associate a commit message with every commit, which you can provide with the -m prefix.
Now let’s try to change some files and commit again.
Changing a file, you will see that git notices these changes : run git status command and check :
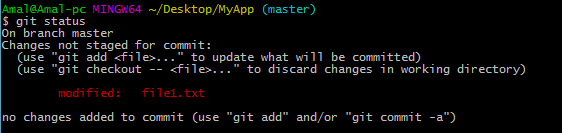
You need to add this file again to stage the changes in tracked file for the next commit. You can add all the tracked file by running: git add -u . Then, you can commit with git commit -m ‘secondCommit’
Putting your code in the cloud
First, you need to tell Git that a remote repository actually exists somewhere online. We do this by adding it to Git’s knowledge. Just like Git didn’t acknowledge our files until we used the git add command, it won’t acknowledge our remote repo yet, either.
To do so, run the following command :
git remote add origin https://github.com/username/myproject.git
We’ve used the word origin to indicate a new place from which files will originate. remote is to indicate the origin is not on the computer, but somewhere online.
Then, push your code to the origin using git push -u command
git push -u origin master 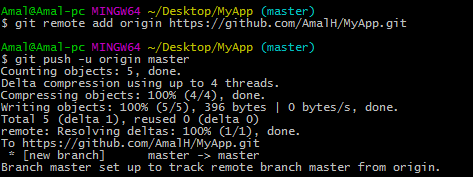
That’s all you have to learn about basic features of Git. I hope this Git tutorial helped you escape the idea that working with Git is complicated.
If you have any questions let me know in comments below.


Recent Comments