Grove Starter Kit With Intel Galileo Gen 2
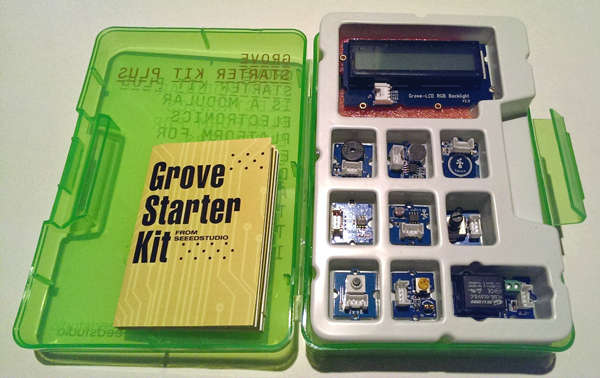
The Grove Starter Kit consists of a collection of sensors, actuators and shields. It is a hardware and software solution to get you started with IoT projects. With Grove shield and sensor modules you wont need to worry about circuits and electronic components. It’s a perfect solution for beginners on IoT . I used this kit on my first IoT workshops with Intel Galileo at school. I was so comfortable making my first IoT solution because all I needed to do was to just plug the sensor modules instead of managing it through soldering or breadboard.
So, to get you started with the kit that will get you started with IoT (![]() ), this IoT tutorial will show you how to make the needed connections and plug your sensors before running your sketches on Arduino IDE.
), this IoT tutorial will show you how to make the needed connections and plug your sensors before running your sketches on Arduino IDE.
Requirements
You will obviously need the Grove starter kit plus – Intel IoT Edition for Intel Galileo Gen 2 and Edison,
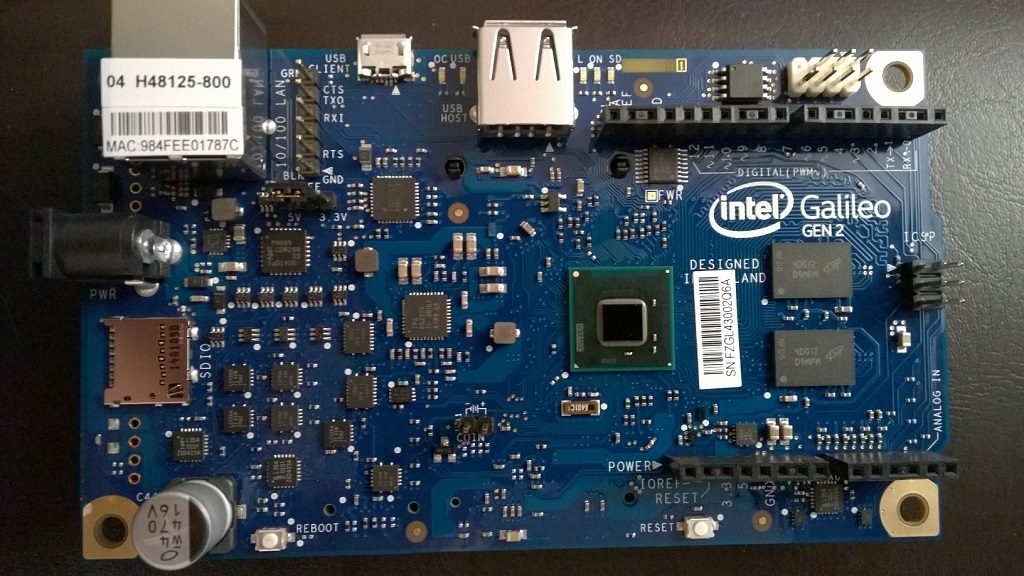
and an Intel Galileo Gen 2 board.
And, you have to download the Seed Studios Sketchbook Starter .
Making connections
Power the Galileo board, you will see the power led light up. Then, connect it to computer via USB cable. Now you can see the USB led light up.
Adding Grove Base Shield
The grove base shiled is an expansion board with many Grove connectors which makes it convenient for you to use Grove sensors together. As you can notice, the shield has a variety of 4-pin plugs for connecting various sensors to Intel Galileo.
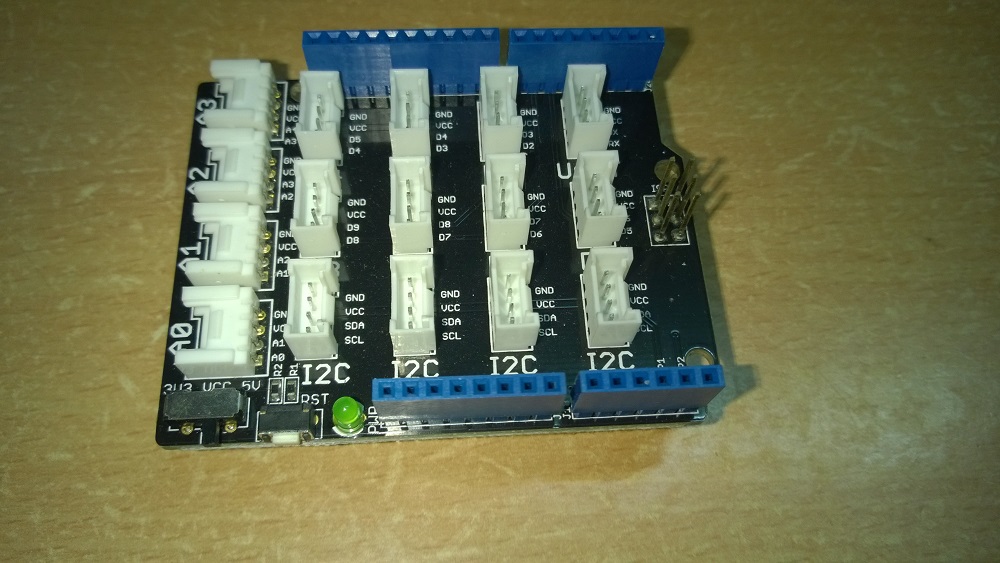
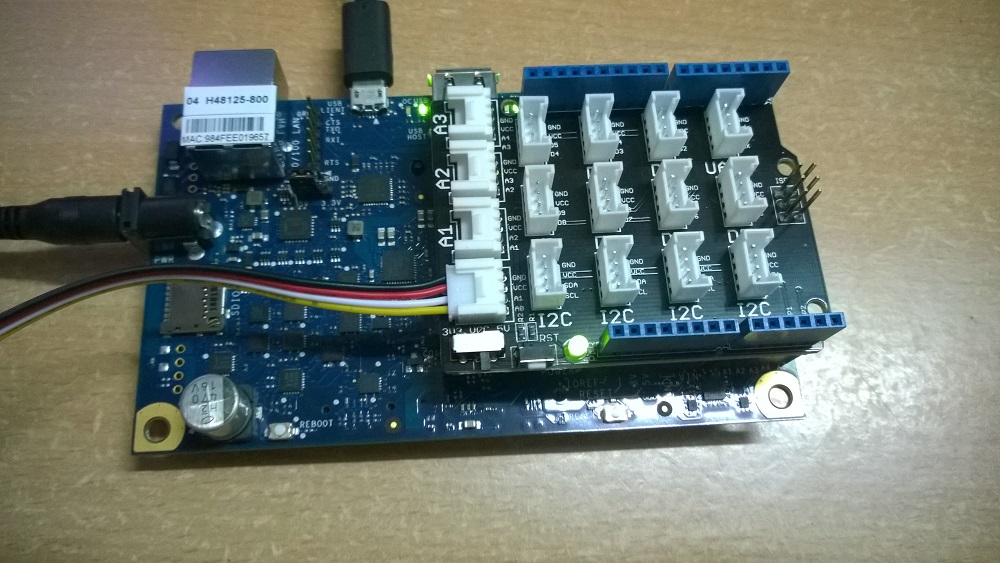
Attach the Base Shield to Intel Galileo board and a green LED on the Base Shield will turn on when it is powered up.
Plugging your sensors
As I already mentioned, this kit perfectly fits for IoT beginners: it offers a set of sensors each with a sample code associated, and all you need to do is apply the previous instructions and attach your sensor to the shield using one of the wires provided in the kit. But, be careful to attach it to the port marked as the default port in the sample code ! (you can change it as desired)
Running your sketch
Once finished plugging the sensor you chose to test, you need to upload your code to Arduino IDE.
Adding sketchbook to Arduino IDE
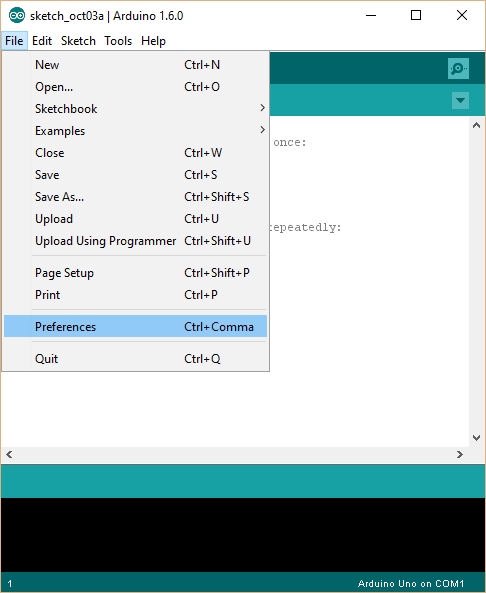
• Extract the downloaded Sketchbook Starter and go to “File-> Preferences” on Arduino IDE
• View the “Sketchbook Location” field
• Click “Browse” and add the Seeed Studios Sketches folder you downloaded.
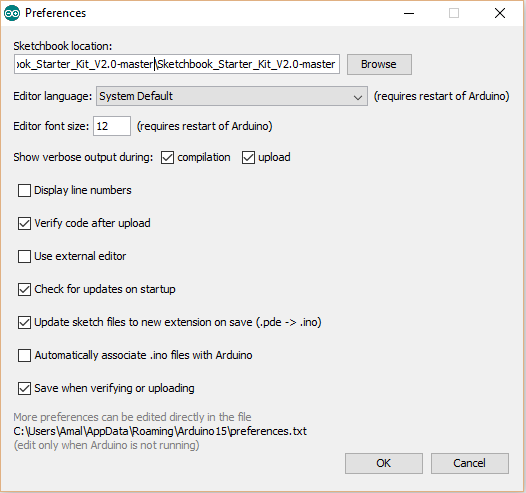
• Restart your IDE.
Upload your code to Arduino IDE
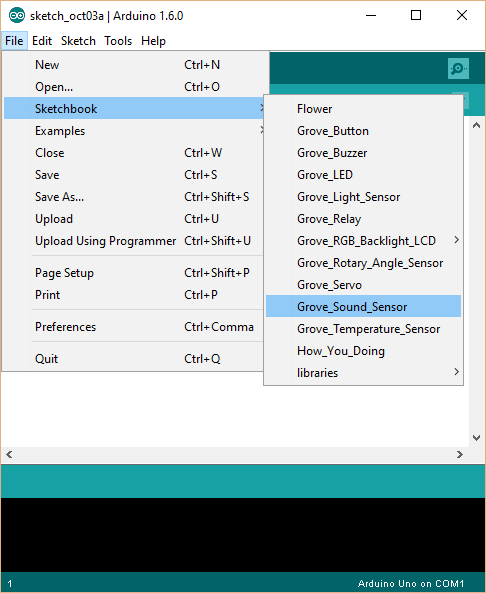
• Open Arduino IDE and go to “File->Sketchbook” to pick a sketch to be loaded.
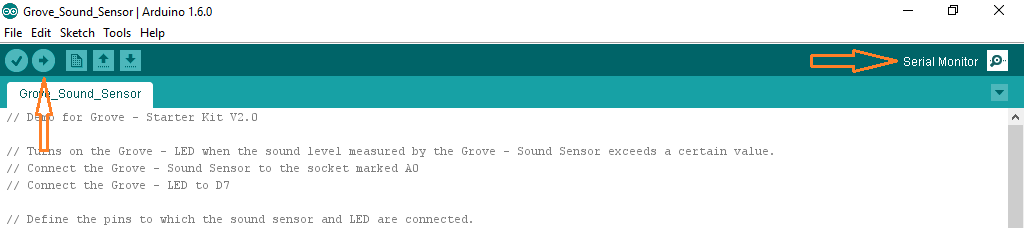
• Click the “Upload” button. You should see a “Transfer Complete” message if it is successfully deployed. Your sensor must be interacting and you can check your results in the Serial Monitor pop-up if you have a written output (the case of the Grove temperature sensor).
That’s it for ‘ getting started with the starter kit ‘ ! Now you are ready to do some more complex projects and dive into the world of IoT. So, next tutorial will be about manipulating multiple sensors following a given scenario.


Recent Comments