Installing Xcode on Windows 10
Building software for Mac is not so workable compared to building software for other plateforms.The reason is: creating Mac software requires the Xcode IDE, which is not available for any other operating systems except Mac OS X and iOS. But that does not mean only Mac users can install Xcode !
This tutorial presents a detailed way on how to install Xcode on Windows 10.
Requirements and downloads
Before initiating the installation process, you need to have the following system requirements:
• minimum 2GB RAM memory (recommended: 4GB+).
• Dual core Intel processor.
• minimum 80GB on hard disk.
Besides, you have to download MacOS 10.12 Sierra VMware Image ,Vmware Workstation and unlocker208 .
Step1: Create a new virtual machine
1- Before creating the virtual machine we need to install the ‘Vmware locker’ patch which is required to run the latest Mac OS X versions (Yosemite, Mountain Lion,Mavericks,El capitan or Sierra) as guest operating systems on Vmware 12 or 11. (earlier versions of OS X like Snow leopard 10.6 can run on vmare without this patch).
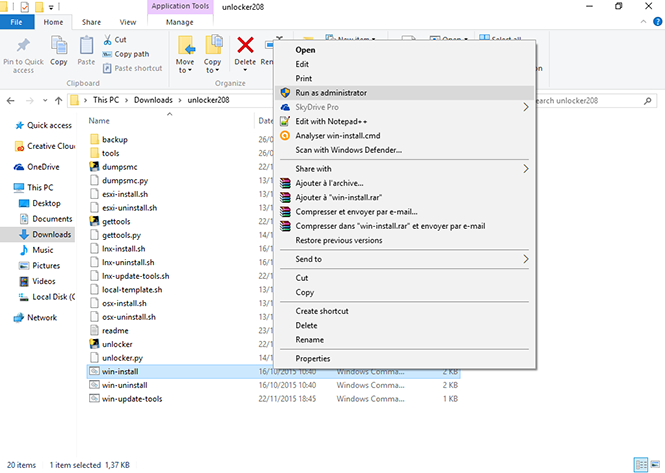
So, first open the unlocker208 extracted files’ folder and right click on win-install and select Run as administrator. This will unlock or start VMware services of Mac so that you can choose and install Mac on VMware.
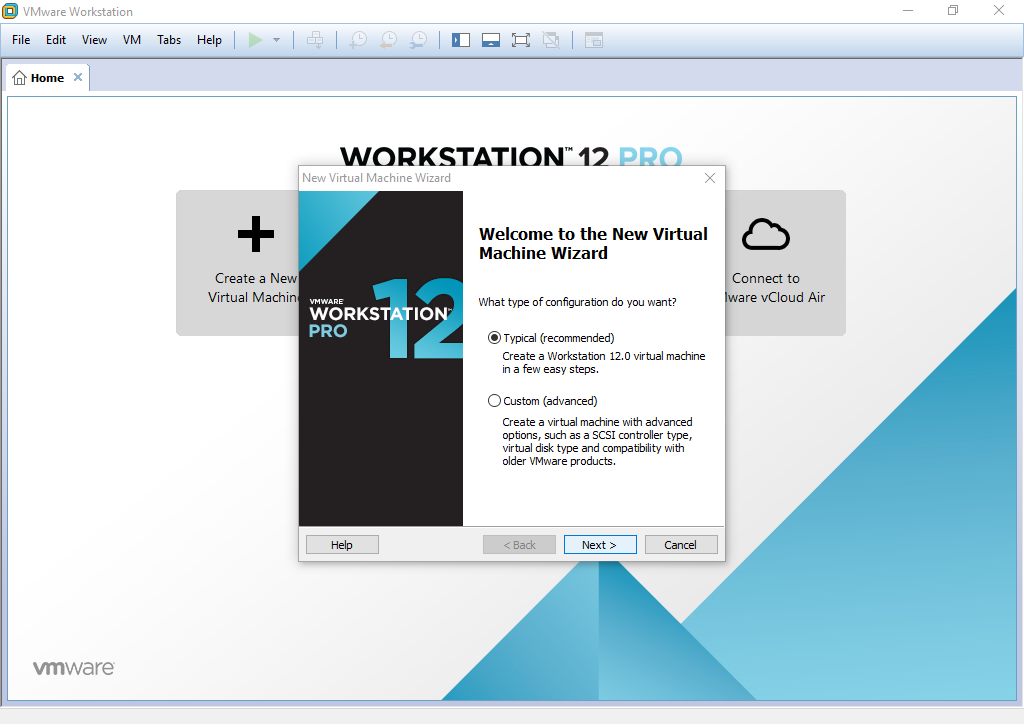
2- Now open VMware and click on File>New virtual machine, then, just click Next.
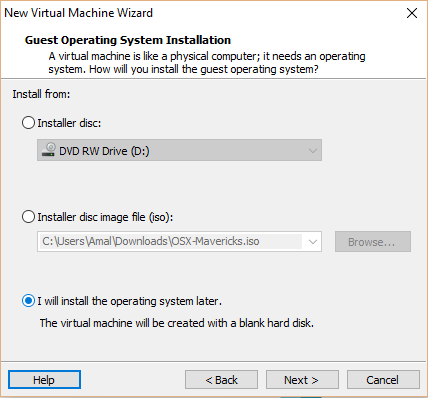
3- Then, you’ve to select I will install the operating system later and click Next.
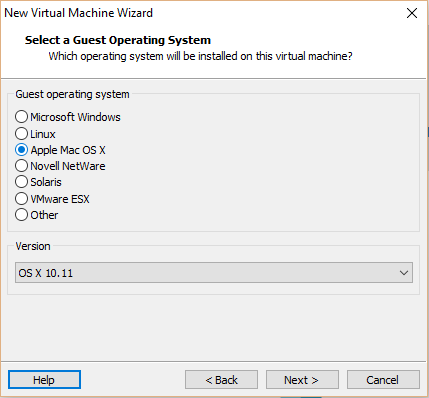
4- In this step, you need to select Apple Mac OS X as operating system and choose 10.11 from OS X version then click Next.
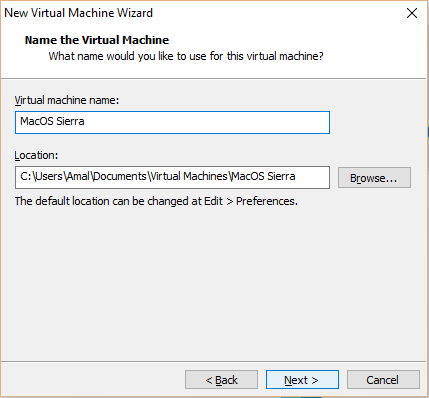
5- Customize your virtual machine name and location for the installation like in this shot and click Next.
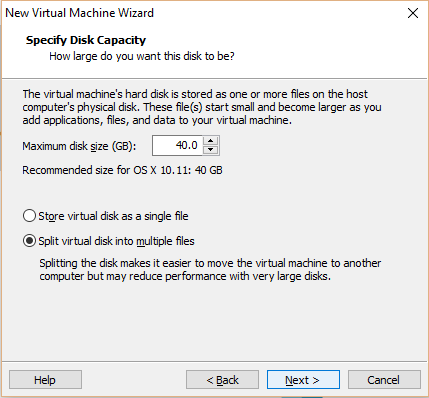
 6- For what comes just hit next. We wont actualy use the drive for our installation
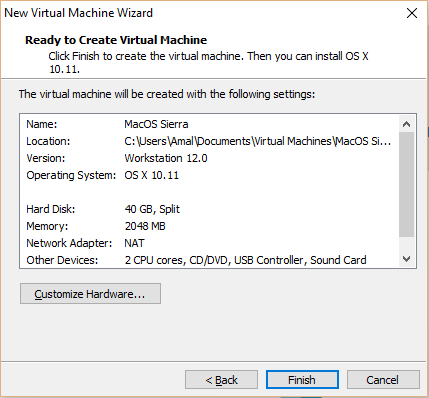
 Click Finish and you get your virtual machine ready to be configured.
Step2: Edit the virtual machine
Once your virtual machine created, dont turn it on !
Instead click on Edit virtual machine settings .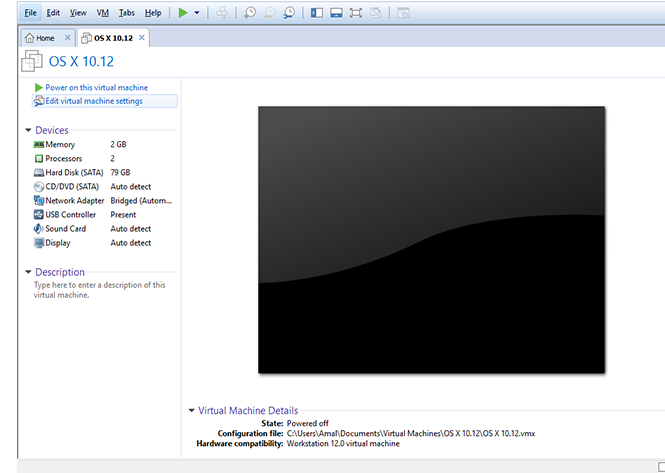 Here you can increase memory, processor if your system allows that and then select Hard Disk option and click Remove.
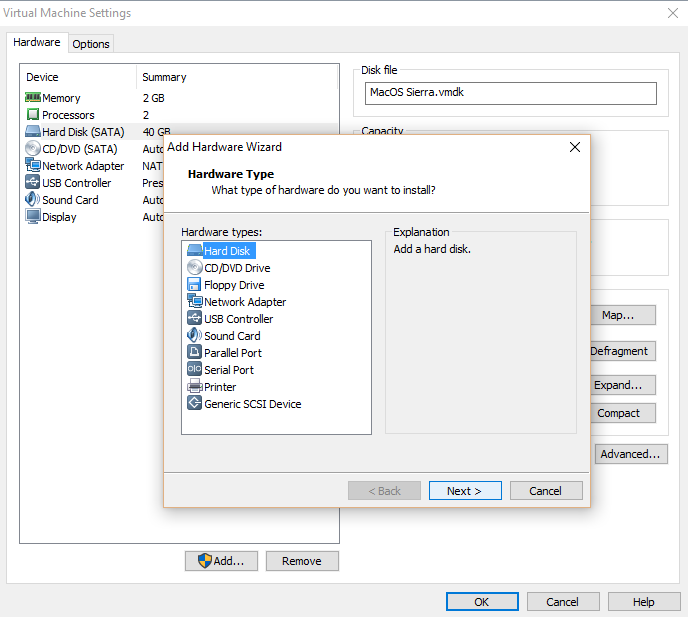
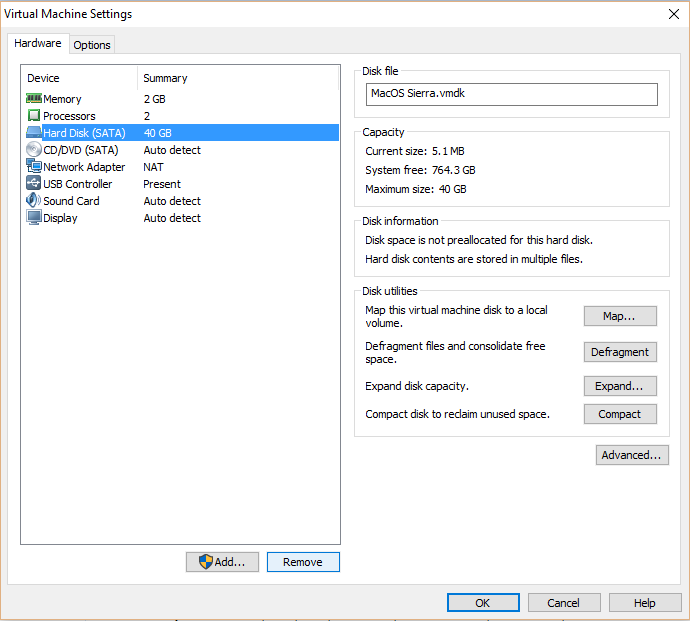 Once the hard disk removed, click Add then select Hard Disk and click Next.
 On this page, let all things by default, just click Next
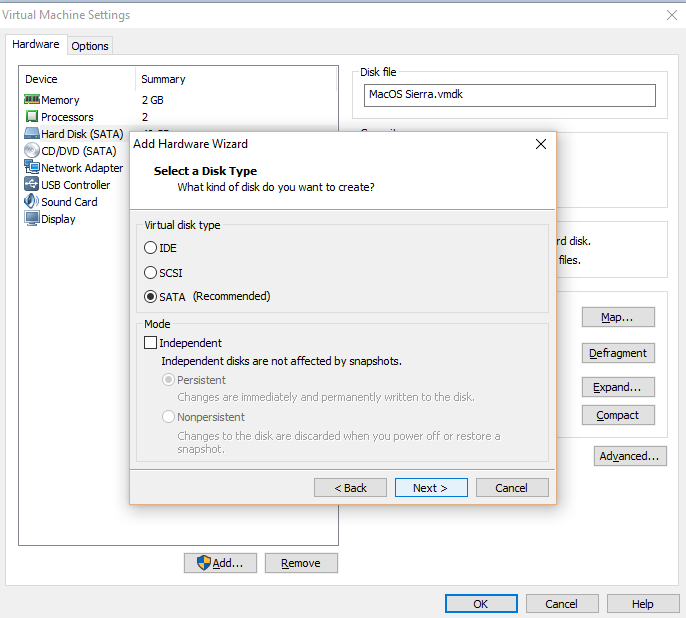
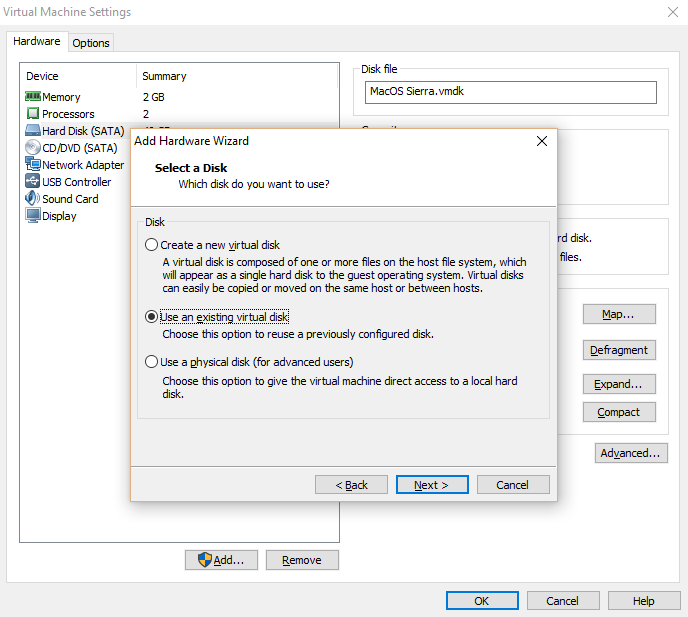
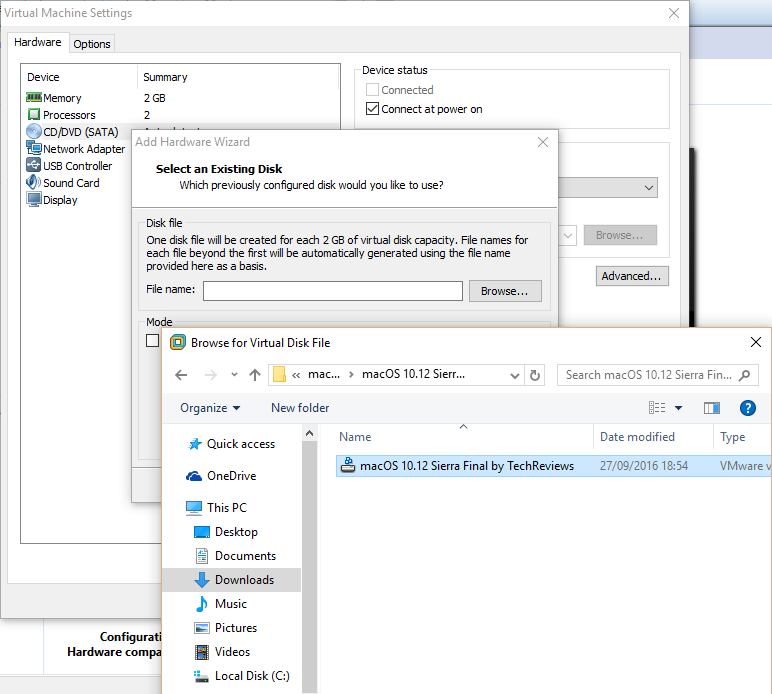
Here you need to select use an existing virtual disk and click Next.
 Now browse the VMDK file of MacOS Sierra from the extracted folder that you had downloaded then click Finish then click Ok on virtual machine settings.
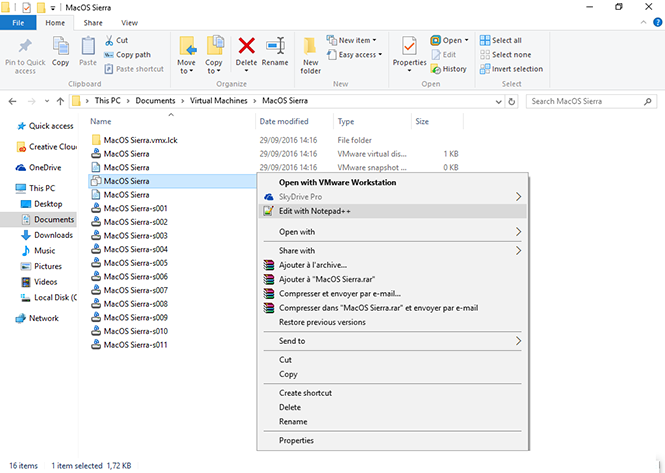
The last step of setting our virtual machine is editing the VMX file. To do that navigate to the macOS Sierra virtual machine files you had created and right-click on it and open it with Notepad.
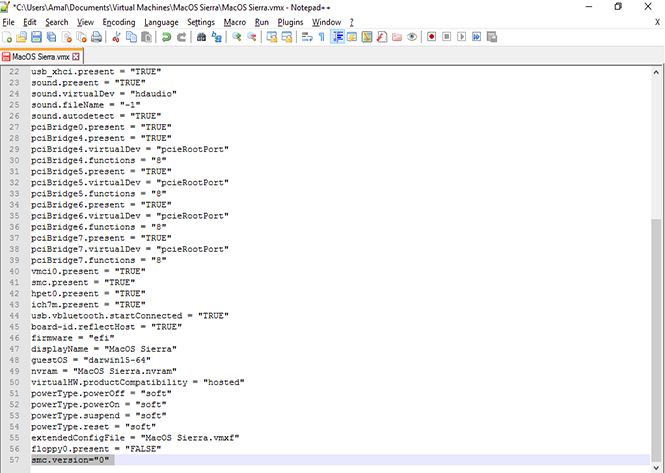
When the file opened, scroll to the end and type the command smc.version = “0” down then press Ctrl+S to save it.
![]() If you got the error later saying the value 0 in Smc.version = “0” is not valid, take away the quotations (Smc.version = 0) and it will work.
If you got the error later saying the value 0 in Smc.version = “0” is not valid, take away the quotations (Smc.version = 0) and it will work.
Step3: Install Mac OS Sierra 10.12 on VMware
Now you can power on the virtual machine, to get the Welcome page of your OS.
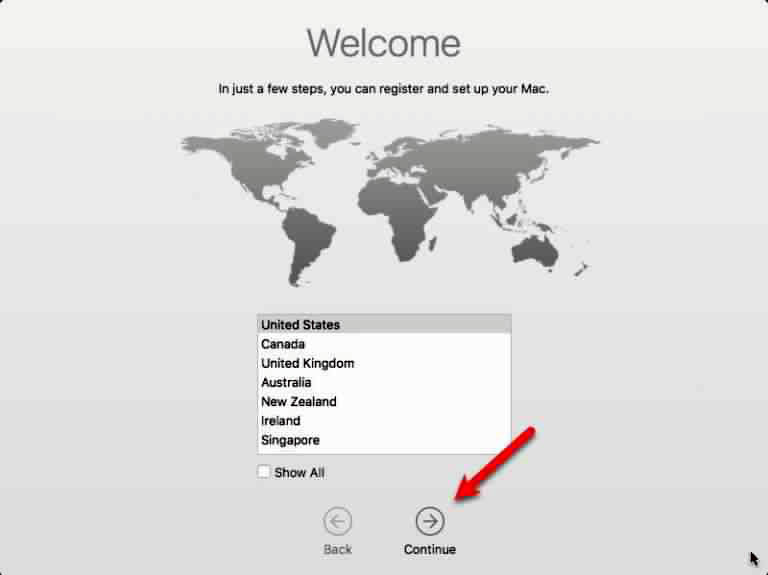 This installation is similar to other typical OS X installations: you will be required to select your keyboard, pick how do you want to transfer your information ( select Don’t transfer any information now ), enable location services and sign in with an Apple ID, with wich you will last create your computer account.
After continuig all these steps you will be on MacOS Sierra. Your final result will be :

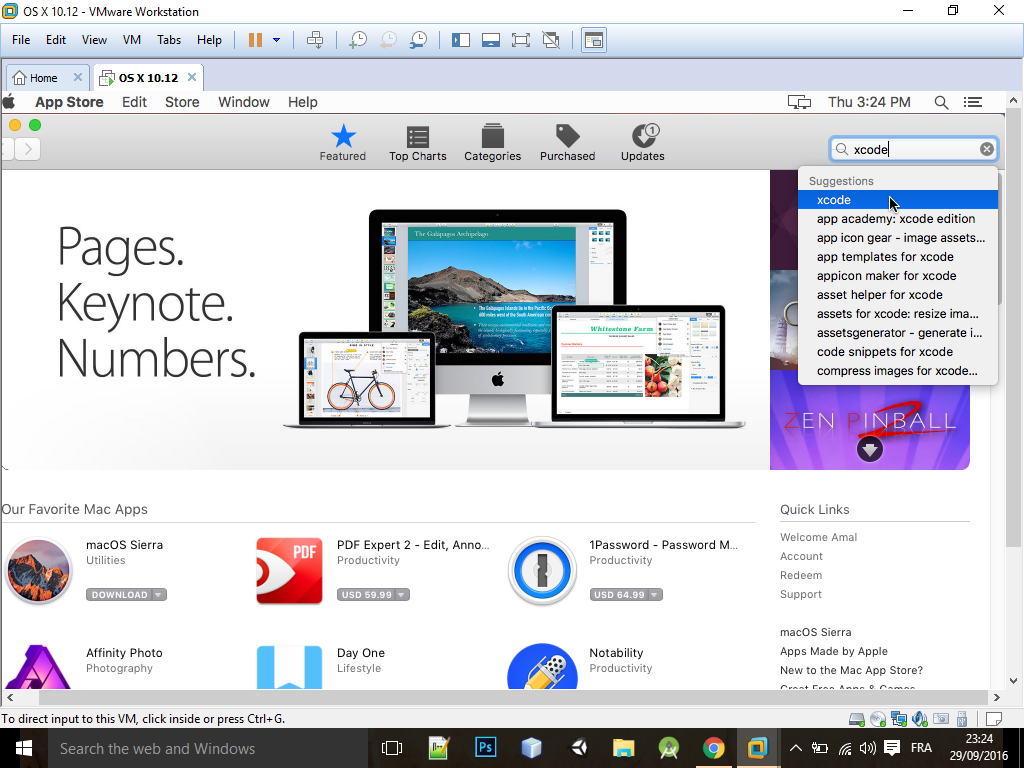
Step4: Install Xcode

Now you simply have to search the App store for Xcode and install it !
These were all the steps needed to install Xcode IDE on your Windows PC. You should certainly consider that the performance and speed of Xcode won’t be extremely high. It can be used for educational purpose, but not for professional app developers.
If you’re facing any installation problems or got confused reach out to me through email or leave your comments below .


Hi Thanks for your guide.
What about the VMWare Tools?
I could not install it on 10.12
Hello,
You can download vmware from here .
( then dont forget to open the unlocker208 extracted files’ folder and right click on win-install and select Run as administrator . this enables you to find the ‘Apple Mac OS X’ option when selecting your os shown in 1.4 ) .
I you have another problem please explain it clearly so that I can help you 🙂
Right when I try to turn it on, it crashes. “Debugger called “? Is there anything I can do? Thanks!
thanks it work for me
you are welcome.
hello ,,
i cant read the vmx notepad++
its less than 6 line inside the file